
This week I was very enthusiastic to start my upcycling journey with a repurposing technique called slit weaving, which involves weaving cut-up strips of material throughout slits cut along a piece of fabric to create a variety of unique designs.
Slit-weaved clothing has fascinated me for years, ever since I began attending outdoor music festivals. Before I even knew the term for this style, I remember being captivated by the intricate designs on pants, bodysuits, and tank tops worn by festival-goers. However, it wasn’t until about a year ago that I discovered what this distinctive style was called. When I looked around online to buy a piece for myself, I quickly realized that most slit weave garments are hand-made and well out of my budget, with the cheapest products still being over $100.
Despite the cost, I’ve spent a decent amount of time scouring second-hand platforms like Depop and Facebook marketplace for more affordable options. However, I’ve consistently noticed that slit-weave clothing is not only highly sought after in the festival fashion industry but also surprisingly scarce. Because of this, I decided to learn how to create these cool designs by myself to save money, repurpose clothing from my wardrobe and exercise a new hobby.
I used a Youtube Video on T-Shirt Weaving 101 to Teach myself the basics:
When I felt confident, I attempted the first technique myself.
Here’s how it went:
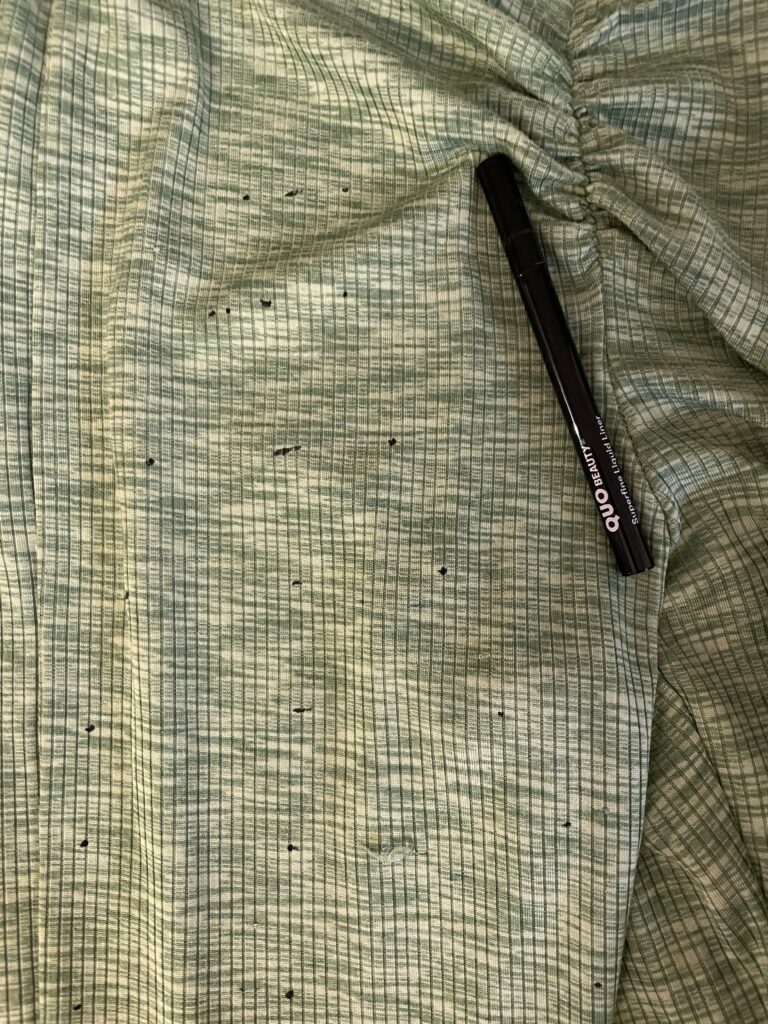
In the first photo in the gallery, you can see black dots ascending the pant leg, marking the middle and two ends of where I intended to cut the slits. In the tutorials I viewed beforehand, many people suggested using chalk to outline these measurements; however, for the sake of saving money and with the constant goal of reducing my reliance on single-use products, I opted to use an eyeliner pen that I didn’t use anymore, as seen in the photo (it washes off!). I measured 1.5 inches in between each slit and cut the length of the slits to correspond with the length of the pant leg.
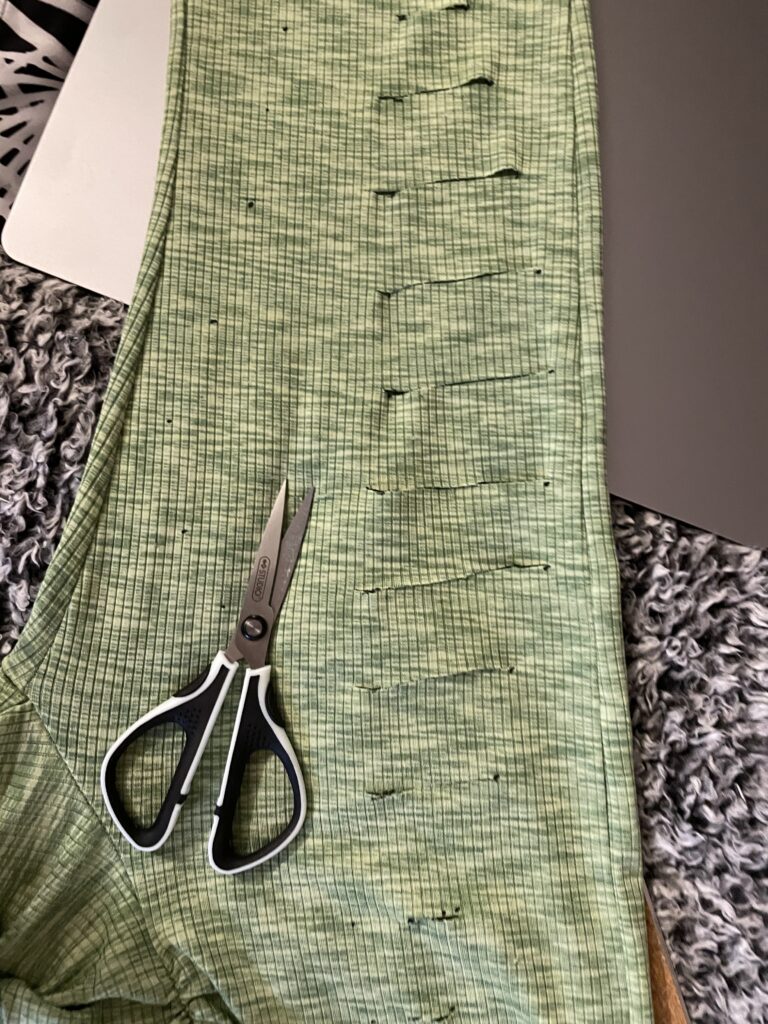
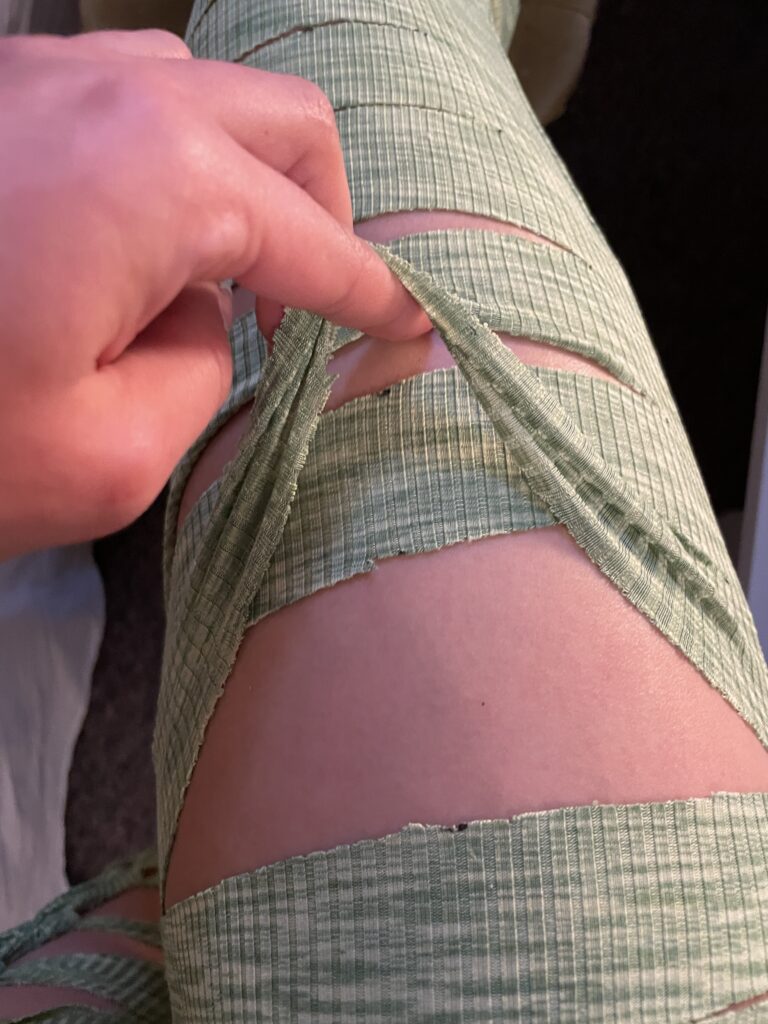
Secondly, I pinched the middle of the pant leg, aligning the seams on either side to ensure precision, and cut a vertical slit in the middle of the pant leg, on the black dots marking 1.5 inches. After the incision was made, I cut slits on the right side of the pant leg, ensuring I did not cut the seam, increasing in length until the middle and then decreasing in length until the knee.
In the last photo in this gallery, I followed the same process on the left side.
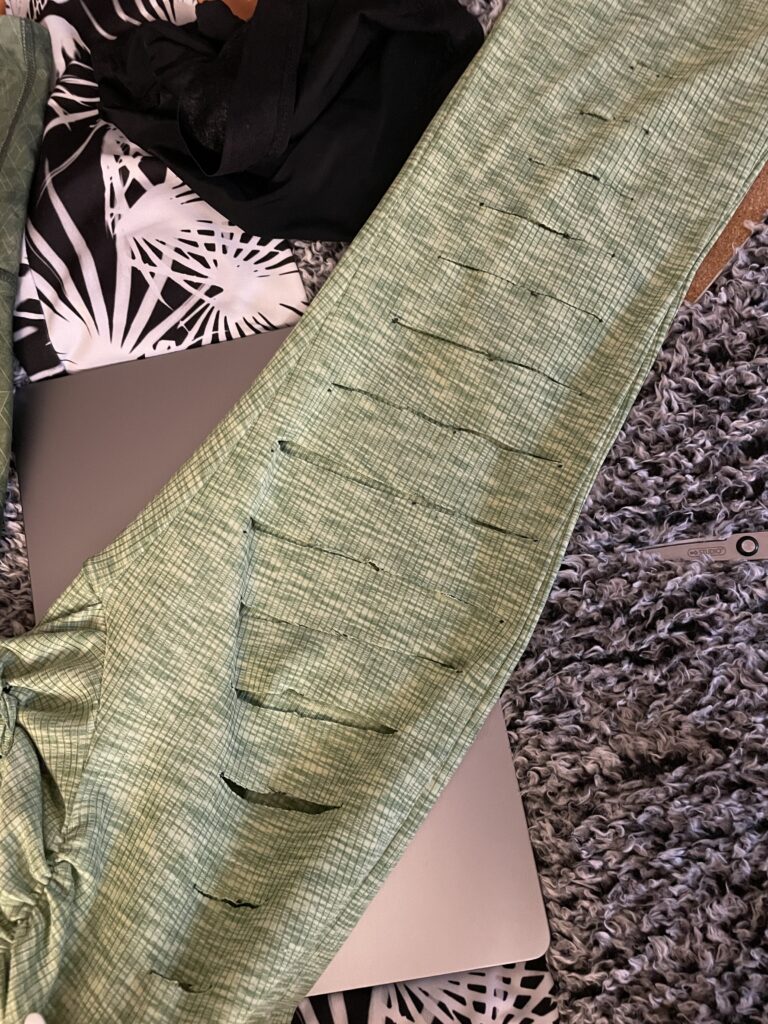
Here’s how it should look:

Tip: Stretch each slit to ensure less strain on the material.
Next, we move onto the weaving process of this project!
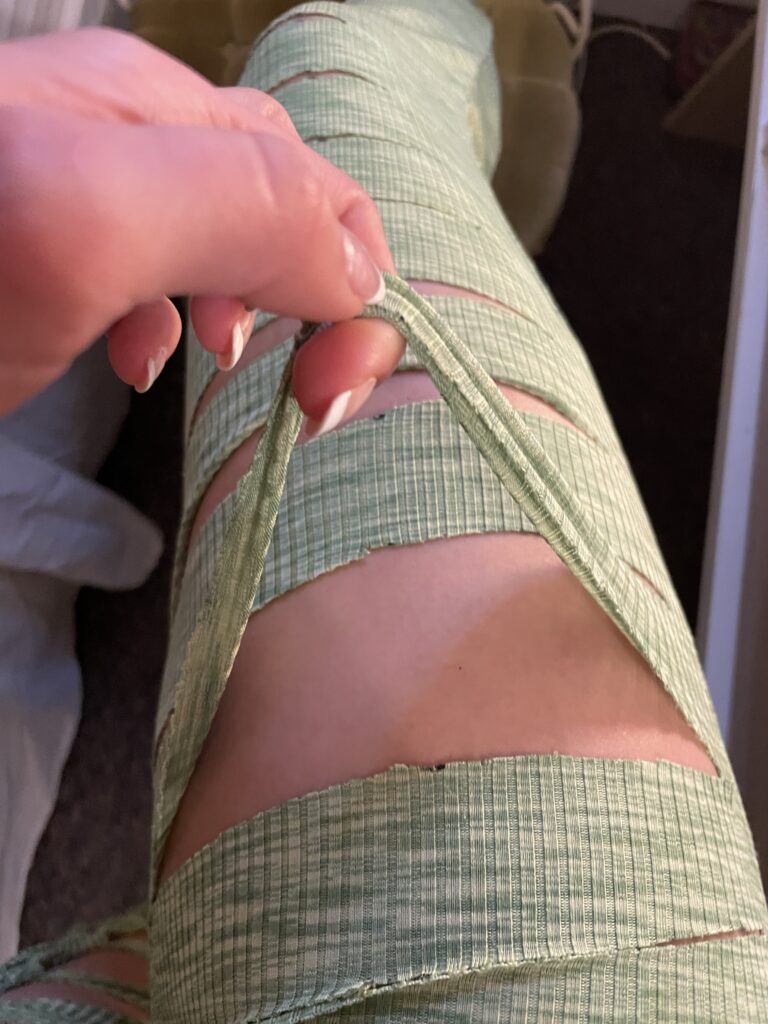
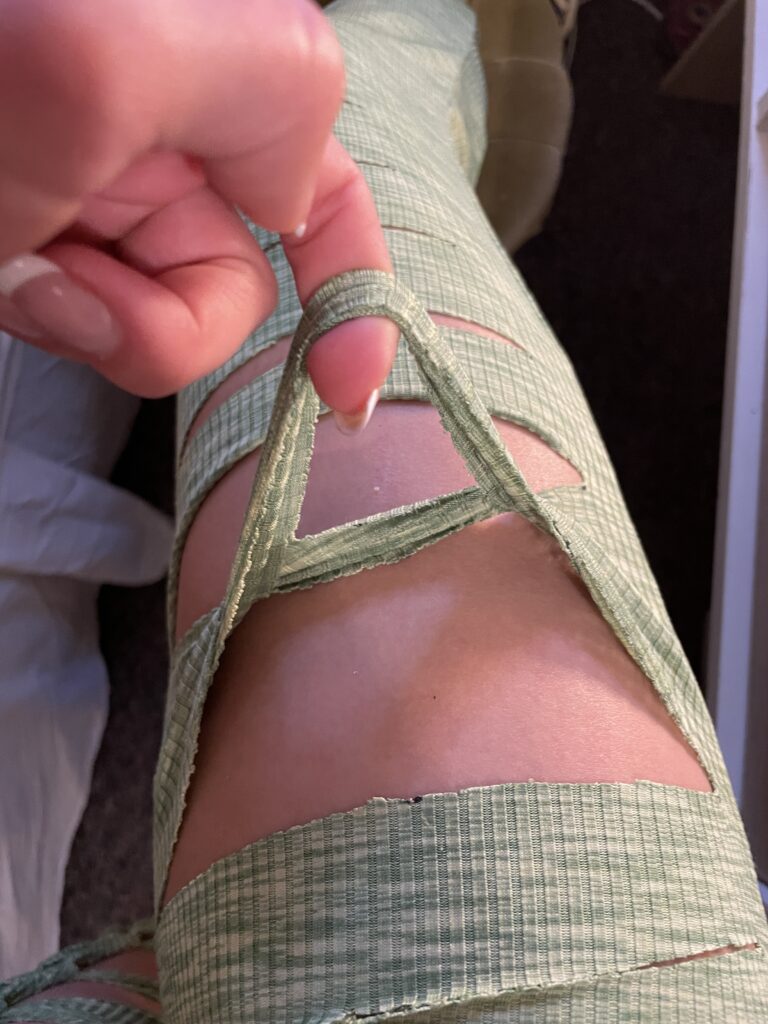
- Grab the first slit: Hold the first slit in your hand
- Pull the second slit under the first: While still holding the first slit, reach for the second slit and pull it under the first; let go of the first slit. Now, the second slit is linked to the first.
- Continue weaving: Repeat this process, adding each new slit to the one before, until all the slits are woven together.
- Secure the last slit: When you reach the final slit, cut a small hole about an inch away from the edge. Then, cut the final fabric in half at the end and double knot it through the freshly cut hole to secure the weave.
This method creates a connected and secure weave with all the slits.
Here’s the final product:
